

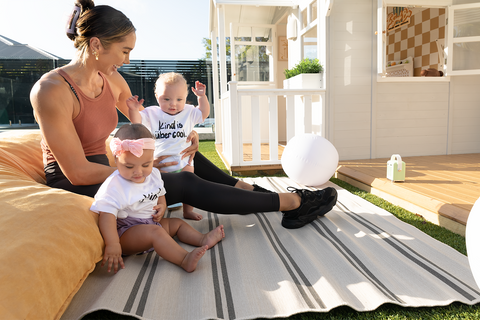
MEET CHONTEL AND THE DUNCAN FAMILY
Chontel Duncan is a fitness enthusiast, nutritionist, gym and franchise owner. She is also a wife and mother to five beautiful children, Jeremiah, Swayde, Paris and twins, Havana and Justice.
THE VISION
As Christmas approached, Chontel wanted to create the ultimate outdoor play space for her little darlings, so in came Elisa (from Blond + Noir) and Annette (from Hide and Seek Kids) to bring her dream to life.
Chontel requested neutral tones, Boho Hamptons x Palm Springs vibes, so Elisa got to work and created this fabulous mood board:

PAINT COLOURS:
Elisa chose the following paint colours:
- Vanilla Quake - body
- Natural White - windows, trims, roof, mud kitchen, internal
- Biscotti by Porter's Paints - front door
- Exterior Ultra Clear by Intergram - floor, mud kitchen, pergola decking


HACKS!
Elisa is the "queen of hacks", she is so creative. Here we'll walk you through how she created some gorgeous feature lighting, and how she gave the mud kitchen a make over to tie in with the rest of the cubby.
Wall Sconce:
The cubby isn't wired, but Elisa loves feature lighting to set the mood, so she used a wall planter from Kmart combined with a cob light from Bunnings to create external lighting.
Step 1: Apply heavy duty velcro to the back of the planter
Step 2: Add the puck light inside the planter with velcro!
And that's it, it's as easy as that.
Here's what you'll need to make your own:
Wall planter:
https://www.kmart.
Puck light:
Velcro:
https://www.bunnings.

Signage Light:
Elisa then created a feature signage light, a take on her previous circle light hack!
Check out the circle light hack here:
https://www.instagram.com/reel/CGGT3KbHwGH/?igshid=YmMyMTA2M2Y=
Step 1: Take two pieces of ply, paint it then apply hack sized wallpaper to one side of each piece.
Step 2: Add words for the wall to one piece to create sign.
Step 3: Use some craft timber to connect the two pieces of ply to create a back and front. Glue one side of the dowel, add hanging hooks and fairy lights inside, then apply the second piece of ply using velcro so can remove it later to change the batteries in the fairy lights.
And just like that... your personalised signage is complete!
Here's what you'll need to make your own:
MDF x 2:
https://www.bunnings.com.
Balsa wood:
https://www.bunnings.
Super Glue:
https://www.bunnings.
Velcro:
https://www.bunnings.
Fairy Lights:


The Mud Kitchen:
Elisa painted the mud kitchen before she assembled it. She placed the pieces in two piles - a pile to paint white and a pile to paint in ultra clear. She chose the ultra clear to give a bronze tone to deepen the timber colour.
Step 1: Apply two coats of ultra clear to seal the timber. Allow drying time between coats.
Step 2: Undercoat the rest of the kitchen with a good quality primer/prep to ensure the paint adheres. If the kitchen will be outdoors, Elisa suggests applying two coats.
Step 3: Apply three coats of white paint (gloss). Allow drying time between coats. Using gloss means that it is easy to wipe clean after messy play. Use painters tape as needed to ensure a neat job.
Step 4: Once the kitchen is assembled, apply the wallpaper.
Splashback: Once the paint is dry, you need to literally peel and stick the wallpaper splashback directly to the space provided. It's that easy. Our splashbacks are cut to size.
Cupboard/ back of oven: Add a smooth and sealed surface first (we love corflute), add the wallpaper piece to the corflute (which you have already trimmed to the correct dimensions to fit space), then peel and stick the wallpaper on to it! Attach the corflute to the kitchen with heavy duty double side tape or velcro strips.
Step 5: Touch up the painting
Once the kitchen is assembled, touch up your paint job e.g. paint over any screw holes etc.
See the before pics here:
https://www.hideandseekkids.com.au/mud-kitchen
After:


Watch the hack instructional videos here:
PRODUCT LIST:
1. The Manor Cubby, Pergola & Mud kitchen
https://www.hideandseekkids.com.au/the-little-manor-cubby-house
2. Checkers cubby wallpaper, Circle breeze blocks pergola wallpaper, Mud kitchen splashback & cupboard back, Bold stripe hack wallpaper - all in bronze & creamy cream
3. ‘Good vibes’ & ‘Flow’ A4 Art prints
4. ‘The Snack Bar’ sign
5. Crash pad
6. Lucy princess doll
https://www.minnimagic.com.au/
7. Kombi light, Peace set & Kombi ‘Duncan Family’ sign
8. Kids ‘Kind is Uber cool’ tees, ‘We rise by lifting others’ wall flag & bag